How Google Consent Mode v2 and ProfitMetrics work together
This article will offer some important definitations as well as general guidelines for how to implement Google Consent Mode correctly.
Part 1: What is Google Consent Mode
Part 2: How does ProfitMetrics work with Google Consent Mode
Part 3: How does Conversion Booster for Google Ads and Google Analytics 4 scripts work with Google Consent Mode
Part 4: General instructions for how to implement Google Consent Mode correctly
Part 5: How to debug Google Consent Mode and ProfitMetrics consent
Part 1: What is Google Consent Mode
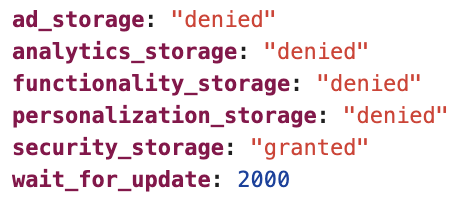
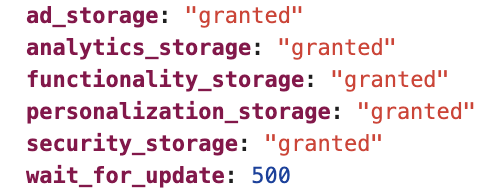
Google Consent Mode is essentially a framework for setting, storing and updating the consent choices of a visitor on your website. The consent state is then pushed to the dataLayer where Google-related products like Google Tag Manager and Google Ads can read the consent state and change their behaviour accordingly. You start by defining a default consent state for each category. Here everything is usually set to denied by default. Then you use your Consent Management Platform (CMP) to update the consent state when the user accepts or denies the different categories. Now whenever Google Tag Manager or Google Ads loads on your page, they will know what the consent state is for each category and change their behavior accordingly.
IMPORTANT: ProfitMetrics DOES NOT install Google Consent Mode on your website. This is something you, your developer, or someone on your team needs to do. You can follow the general instructions for how to install Google Consent Mode later in Part 3 of this article.
Part 2: How does ProfitMetrics work with Google Consent Mode
When setting up ProfitMetrics there are multiple scripts working together to maximize the accuracy of your marketing activities.
The ProfitMetrics Script/App/Module/Plugin
Depending on which e-commerce platform you are using and how your integration is set up, ProfitMetrics will load a script on your website to store marketing- and analytics-related identifiers like gclid, fbc, session id, email, and more if we have permission. When doing so ProfitMetrics allows for the ability to automatically check if consent has been granted, as well as manually defining consent, before storing these values.
We currently DO support the following consent solutions by default:
- Shopify
- Cookieinformation.com
- Cookiebot.com
- Dandomain Classic
- Dandomain (SmartWeb, ScanNet, WannaFind, HostedShop)
- Google Consent Mode (Only if the integration is set up through one of our custom Google Tag Manager templates for Universal Client-Side or Serverside Hybrid Universal integration)
We currently DO NOT support the following consent solutions by default:
- Google Consent Mode
- Cookie Script
- CookieFirst
- CookieYes
- Iubenda
- Onetrust
- Other
Part 3: How does Conversion Booster for Google Ads and Google Analytics 4 scripts work with Google Consent Mode
When setting up ProfitMetrics you are also given instructions for how to set up our Conversion Booster for Google Ads as well as Google Analytics 4 scripts. These scripts are standard Google tags (Gtag) with some minor modifications. As such, the consent state for these is controlled by Google Consent Mode and ProfitMetrics is not able to control the consent of these tags. Once Google Consent Mode has been implemented correctly, these tags will automatically listen for the consent state and change their behaviour accordingly. without the need to change anything.
This means that Conversion Booster for Google Ads and Google Analytics 4 script DO support Google Consent mode by default.
When ProfitMetrics receives an order from the e-commerce platform, we are able to send that order into Google Ads and Google Analytics 4 via Google's own API / Server-Side integration. The main difference here is that we DO NOT use Google Consent Mode to determine if consent has been granted like the Google tag (Gtag) does. Instead, we rely on the consent status of the ProfitMetrics script at the time of the order.
If you have manually defined consent with the ProfitMetrics script, we use the manually defined consent state.
If you use Shopify, we use the consent status available within Shopify.
If you use CookieInformation, Cookie Bot or any other Consent Management Platforms (CMP) listed in Part 2 of this article, we automatically use the consent state provided by these platforms.
If no Consent Management Platform has been identified, we automatically assume consent has been given.
So when we send in conversions to Google Ads and Google Analytics 4, we also send in the required consent status of the different categories, based on the consent status within ProfitMetrics.
Part 4: General instructions for how to implement Google Consent Mode
As you should be aware by now, ProfitMetrics DOES NOT set the default or updated consent state for Google Consent Mode. As each website is different, you or someone on your team needs to set this up. Most Consent Management Platforms like Cookebot or Cookie Information already have full support for Google Consent Mode and provide detailed instructions on how to set them up. You can find a list of certified Consent Management Platforms here.
In practice, Google Consent Mode consists of two things. The Default consent state and the Updated consent state. The default consent state must be set BEFORE any Google-related scripts are implemented for this to work properly.
Example of how to implement the default consent state at the beginning of the <head></head> section:
<!-- The initial config of Consent Mode v2 -->
<!-- Set default consent to 'denied' -->
<!-- Determine actual values based on customer's own requirements -->
<!-- Wait for consent to be updated by CMP -->

    <script type="text/javascript">
      window.dataLayer = window.dataLayer || [];
      function gtag() {
        dataLayer.push(arguments);
      }

     gtag('consent', 'default', {
     'ad_storage': 'denied',
     'ad_user_data': 'denied',
     'ad_personalization': 'denied',
     'analytics_storage': 'denied',
     'functionality_storage': 'denied',
     'personalization_storage': 'denied',
     'security_storage': 'denied',
     'wait_for_update': 15000
     });
     gtag('set', 'ads_data_redaction', true);
</script>
The next step is to load your Consent Manage Platform like Cookieinformation.com, Cookiebot or any other Cosnent Manage Platform (CMP) you might use that supports Google Consent Mode. The Consent Management platform will then automatically push the updated consent to the DataLayer.
Example of where to insert your Consent Management platform
<!-- The initial config of Consent Mode v2 -->
<!-- Set default consent to 'denied' -->
<!-- Determine actual values based on customer's own requirements -->
<!-- Wait for consent to be updated by CMP -->

    <script type="text/javascript">
      window.dataLayer = window.dataLayer || [];
      function gtag() {
        dataLayer.push(arguments);
    }

    gtag('consent', 'default', {
     'ad_storage': 'denied',
     'ad_user_data': 'denied',
     'ad_personalization': 'denied',
     'analytics_storage': 'denied',
     'functionality_storage': 'denied',
     'personalization_storage': 'denied',
     'security_storage': 'denied',
     'wait_for_update': 15000
     });
     gtag('set', 'ads_data_redaction', true);
</script>

<!-- INSERT CONSENT MANAGEMENT PLATFORM HERE -->
The last step is to include your Google Tag Manager, Google Ads, Google Analytics or any other Google script that requires consent.
Example of where to insert Google Tag Manager, Google Ads and Google Analytics 4
<!-- The initial config of Consent Mode v2 -->
<!-- Set default consent to 'denied' -->
<!-- Determine actual values based on customer's own requirements -->
<!-- Wait for consent to be updated by CMP -->

    <script type="text/javascript">
      window.dataLayer = window.dataLayer || [];
      function gtag() {
        dataLayer.push(arguments);
    }

    gtag('consent', 'default', {
     'ad_storage': 'denied',
     'ad_user_data': 'denied',
     'ad_personalization': 'denied',
     'analytics_storage': 'denied',
     'wait_for_update': 15000
     });
     gtag('set', 'ads_data_redaction', true);
</script>

<!-- INSERT CONSENT MANAGEMENT PLATFORM HERE -->

<!-- INSERT GOOGLE TAG MANAGER, GOOGLE ADS, GOOGLE ANALYTIS 4 HERE -->
Now you have defined the default consent state the first time a visitor loads your website, then your Consent Management Platform (CMP) will update the consent as soon as it is granted, and Google Tag Manager, Google Ads and Google Analytics 4 will automatically listen for the consent state that is given for each category.
5. How to debug Google Consent Mode and ProfitMetrics Consent
- Open your website in a new incognito window and/or make sure you delete all cookies and local storage before you start
- you should see a fresh page with some kind of Consent Management Platform (CMP) loaded on the screen.
- Right-click anywhere on the page and click Inspect

- Click Console

- Type "dataLayer" and hit Enter (you might need to hit it twice)

- Click the arrow underneath "dataLayer" to reveal all the events in the dataLayer. If you see a line containing "['consent', 'default'," you have successfully implemented Google Consent Mode default settings.

Click the dropdown arrow to see the different categories and their consent state.
- Check Consent State for ProfitMetrics
- For Server-Side Hybrid Universal Integration
Copy the following line and paste it into the consoleProfitMetrics

- For Shopify
Copy the following line and paste it into the console
Shopify.customerPrivacy.userCanBeTracked();

- For Server-Side Hybrid Universal Integration
- If "cookieStatisticsConsent:" and "cookieMarketingConsent:" are false, it means that ProfitMetrics does not have consent which is good since consent has not yet been granted.
- Click "Accept all" on your Cookie Consent Management Platform (CMP

- Type "dataLayer" and hit Enter (you might need to hit it twice)

- Click the arrow underneath "dataLayer" to reveal all the events in the dataLayer.
- You should see a new event called ['consent', 'update',

- Click the arrow to reveal a dropdown and see the updated consent for each category.

- Type "ProfitMetrics" and hit Enter (you might need to hit it twice)

- If "cookieStatisticsConsent:" and "cookieMarketingConsent:" are true, it means that ProfitMetrics has received the updated consent and everything works as intended.
Common issues and solutions
If dataLayer does not include any events named 'consent' you need to set up Google Consent Mode as outlined in Part 2 of this article.
If dataLayer DOES show the event named ['consent', 'default', but DOES NOT show an event named ['consent', 'update', then you need to ensure your Consent Management Platform (CMP) supports Google Consent Mode and pushes the update to the dataLayer.
If dataLayer DOES NOT show the event named ['consent', 'default', but DOES show the event named ['consent', 'update', then your Consent Management Platform (CMP) does support Google Consent Mode but you need to insert the default consent state as outlined in Part 2 of this article.
If ProfitMetrics shows "cookieStatisticsConsent:" and "cookieMarketingConsent:" as true, even though the dataLayer shows false, or if "cookieStatisticsConsent:" and "cookieMarketingConsent:" as false, even though the dataLayer shows true, you need to ensure that you have implemented the necessary consent variables according to our documentation.
For Shopify: You need to enable consent within your Shopify preferences.
For Google Tag Manager: You need to enable consent within the Tags we have provided
For any other platform, it depends on how your Consent Management Platform is set up.
Contact Support if you need assistance setting up consent for your ProfitMetrics integration.