1. Click "Copy snippet" to copy the script to the clipboard
<!-- Start ProfitMetrics - Conversion Booster for Google Ads -->

function() {

var trackedValue = [[ INSERT_ORDER_TOTAL_VARIABLE ]]; // edit this line

if (!isNaN(Number(trackedValue))) {

return Number(trackedValue) * 0.2;

}

return null;

}

<!-- End ProfitMetrics - Conversion Booster for Google Ads -->
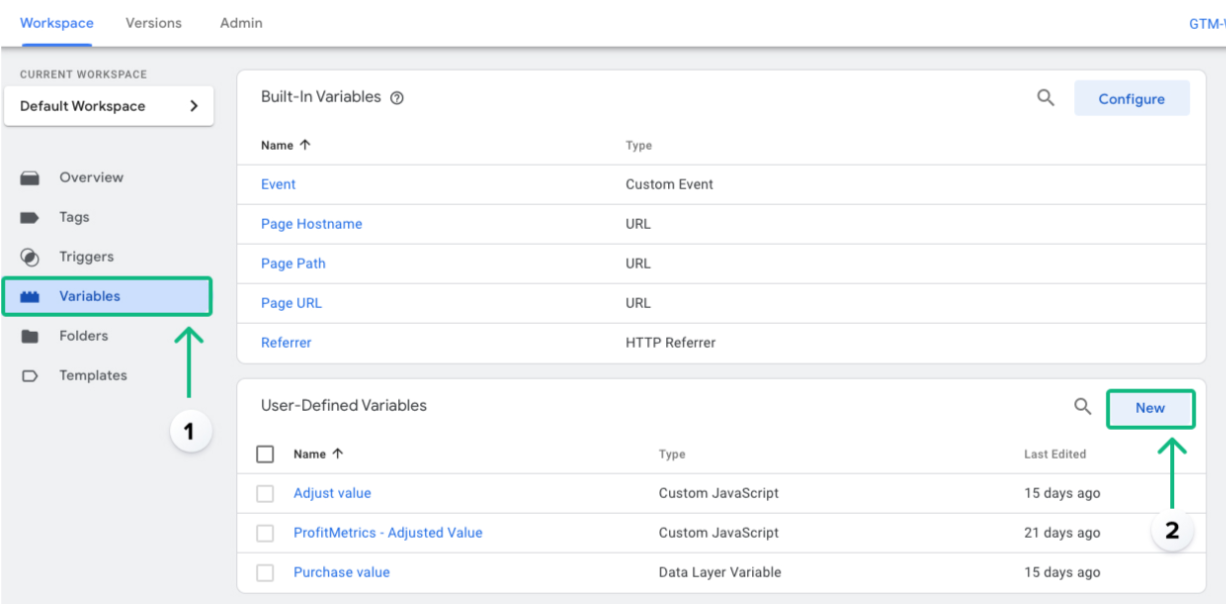
2. Create a new variable
Click "Variables" from the main menu (1).
Then click "New" (2).
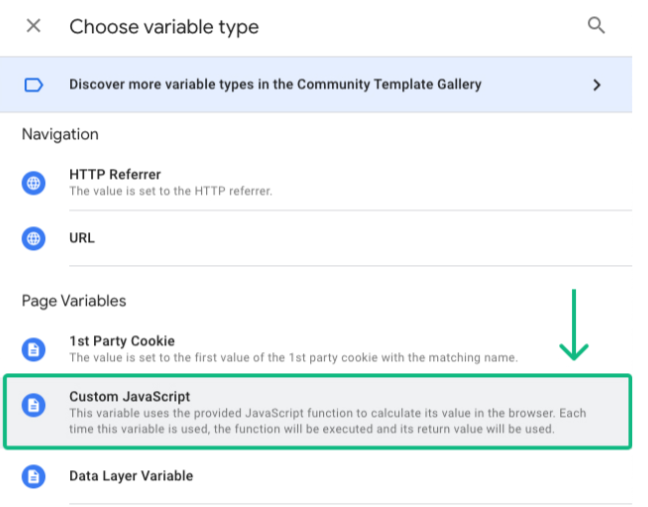
3: Select the "Custom JavaScript" type, Click "Custom Javascript".
4: Insert the script
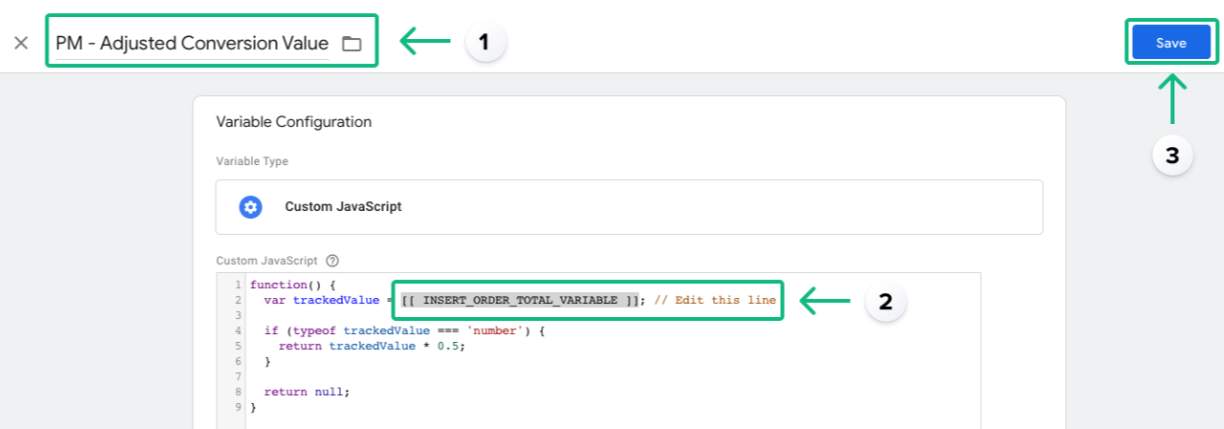
Enter a name for the variable (1). Then paste the script you copied in step one into the text field. Replace the [[ INSERT_TOTAL_VARIABLE ]] text with a GTM variable that holds the order total value. It could look like this: {{ Order Total }} (2). Once you start writing {{ Google Tag Manager will start suggesting variable names. When you have inserted your variable, click "save" (3).
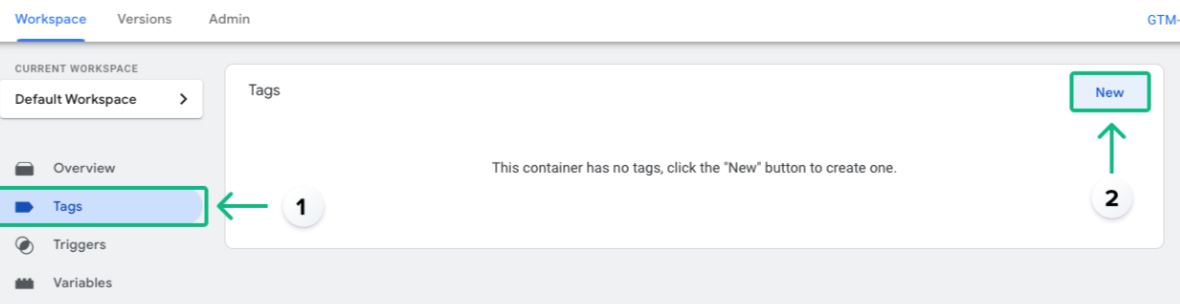
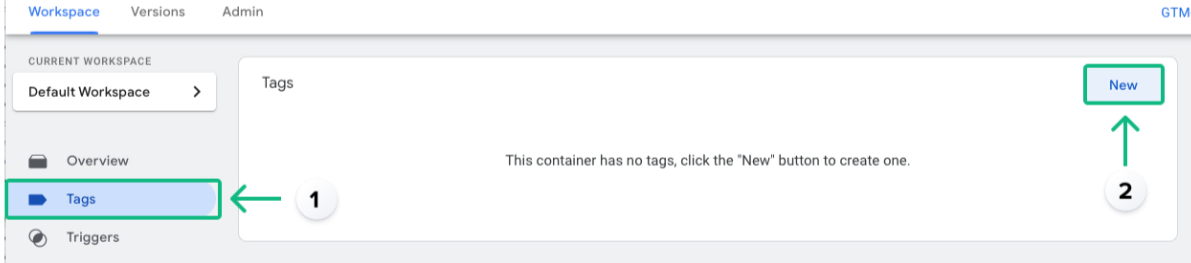
5: Create a new tag, go to "Tags" from the main menu (1), then click "New" (2).
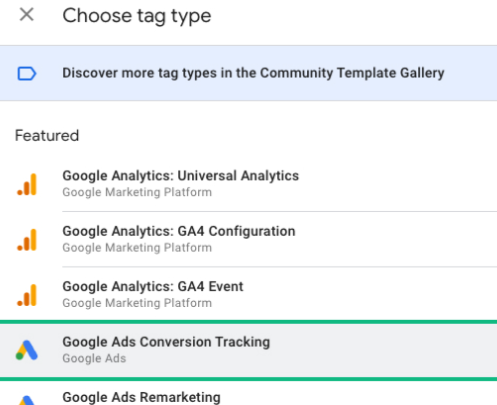
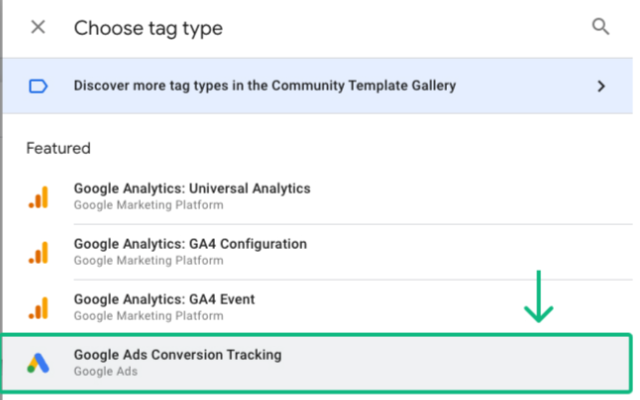
6: Select "Google Ads Conversion Tracking" Click on the "Google Ads Conversion Tracking" option.
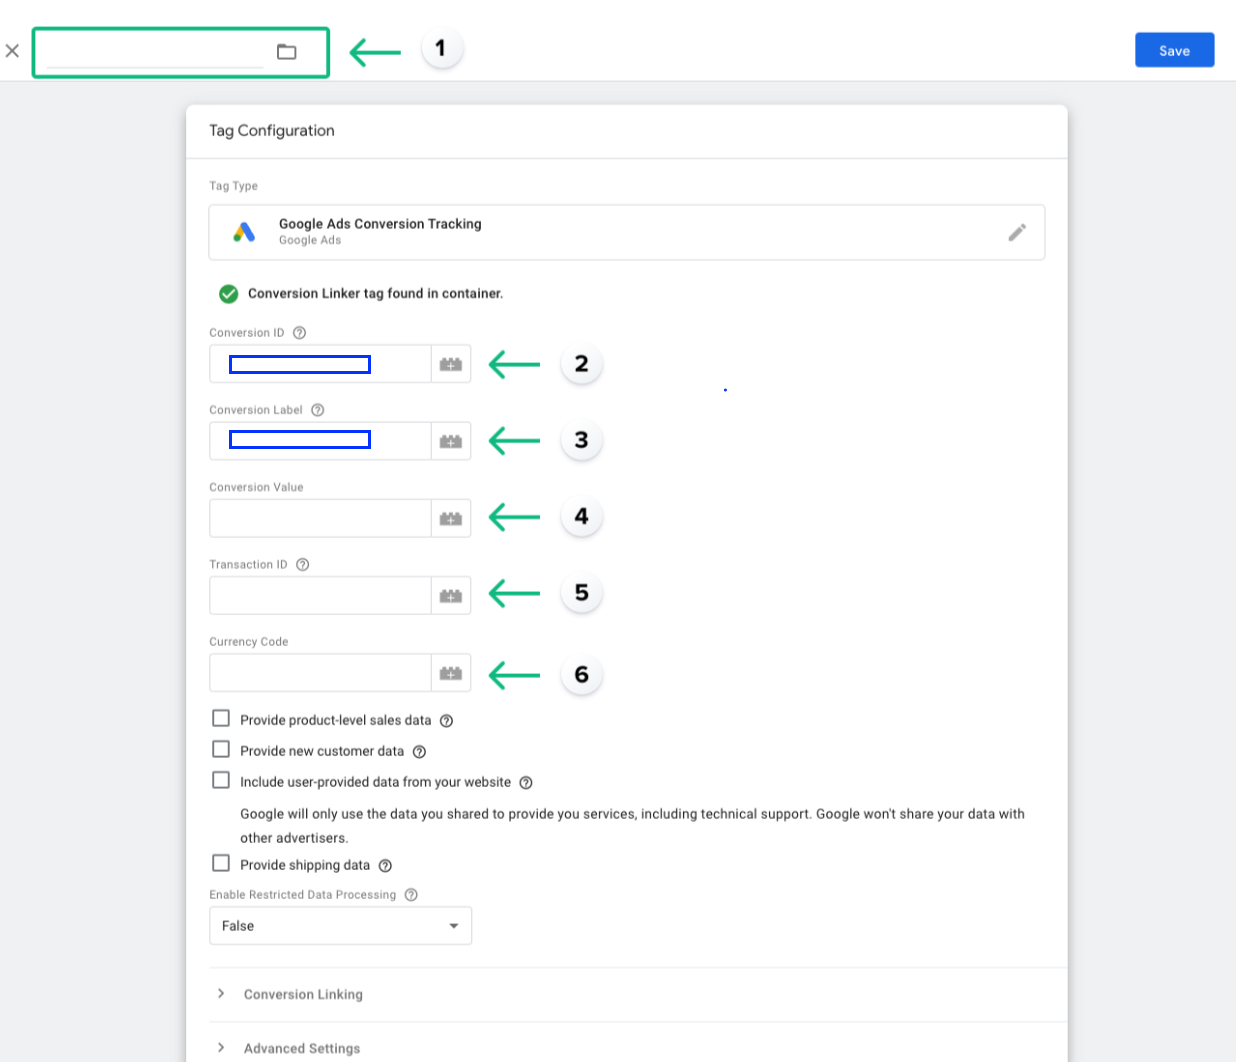
7: Configure the new profit tracking tag
- Prepare information in Google Ads
-
- Open Google Ads in a new tab, go to Conversion actions
- Open PM - Gross Profit
- View Tag Setup
- Use Google Tag Manager
- Use the information here for the next two steps
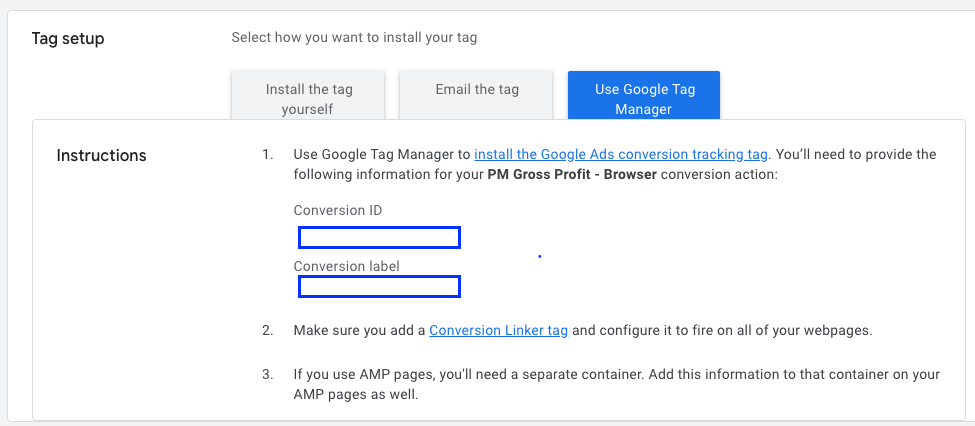
- Enter a name for the Tag
- Enter the Conversion ID from the Tag Manager
- Enter the Conversion Label from the Tag Manager
- Enter the name of the variable you created earlier in the Conversion Value field. You can click the "+" button to browse through your variables.
- Enter a variable for the Transaction ID.
- Enter a variable for the Currency Code.
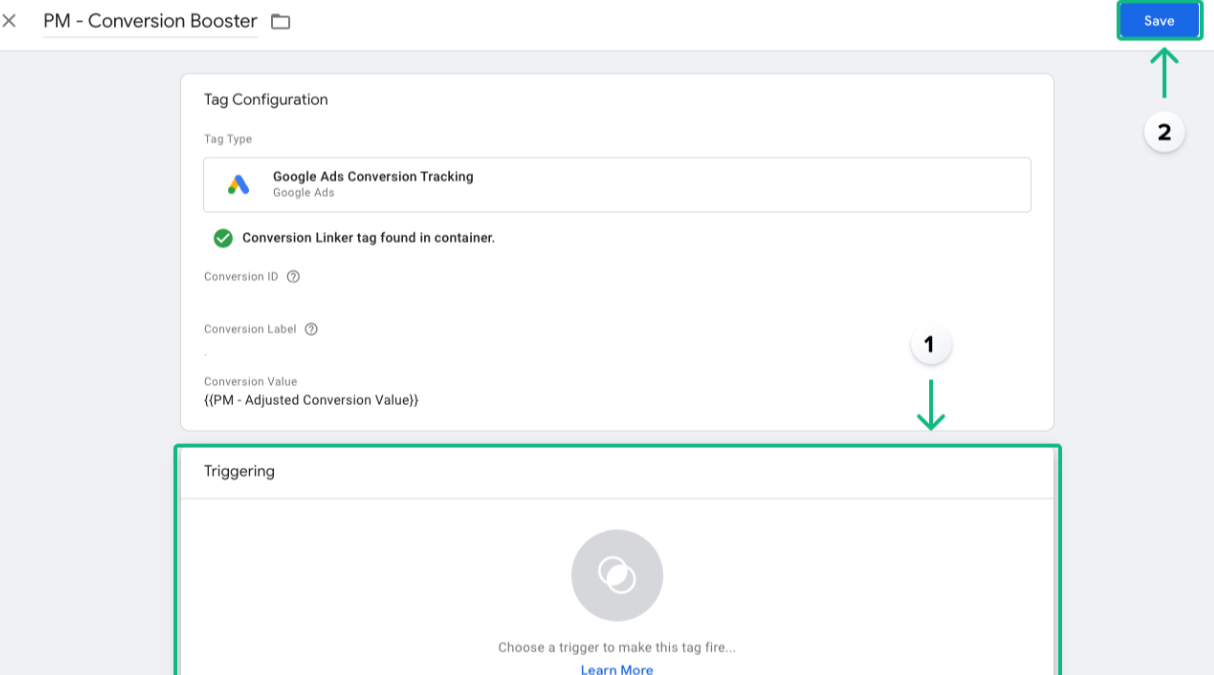
8: Configure tag trigger
Select a trigger that will make the tag fire on your order confirmation page (also called the "Thank you" page) (1). Then click "Save" (2).
9: Create a new tag
Go to "Tags" from the main menu (1). Then click "New" (2).
10: Select "Google Ads Conversion Tracking"
Click on the "Google Ads Conversion Tracking" option.
11: Configure the new revenue tracking tag
- Prepare information in Google Ads
-
- Open Google Ads in a new tab, go to Conversion actions
- Open PM Revenue - Browser
- View Tag Setup
- Use Google Tag Manager
- Use the information here for the next two steps
- Enter the Conversion ID from the Tag Manager
- Enter the Conversion Label from the Tag Manager
- Enter your regular "Order total" variable (not the one you just created). You can click the "+" button to browse through your variables.
- Enter a variable for the Transaction ID.
- Enter a variable for the Currency Code.
12: Configure tag trigger
Select a trigger that will make the tag fire on your order confirmation page (also called the "Thank you" page) (1). Then click "Save" (2).

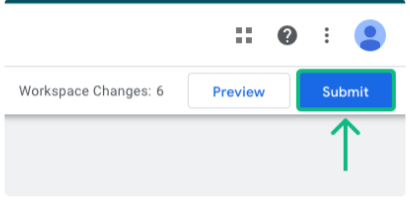
13: Publish the changes
Click "Publish" in the upper right corner of the screen to save the changes